Field overview
The field overview is your central hub and preferred way for creating new smart fields and configuring existing ones.
Search & filter
Once you have created a few smart fields you can use the search and filter options to quickly navigate to the field you want to update.

The projects dropdown will filter the context a smart field is available for. https://support.atlassian.com/jira-cloud-administration/docs/configure-custom-field-context/
As a default, new smart fields are being created using the Global Context making them available for all project and work item types.
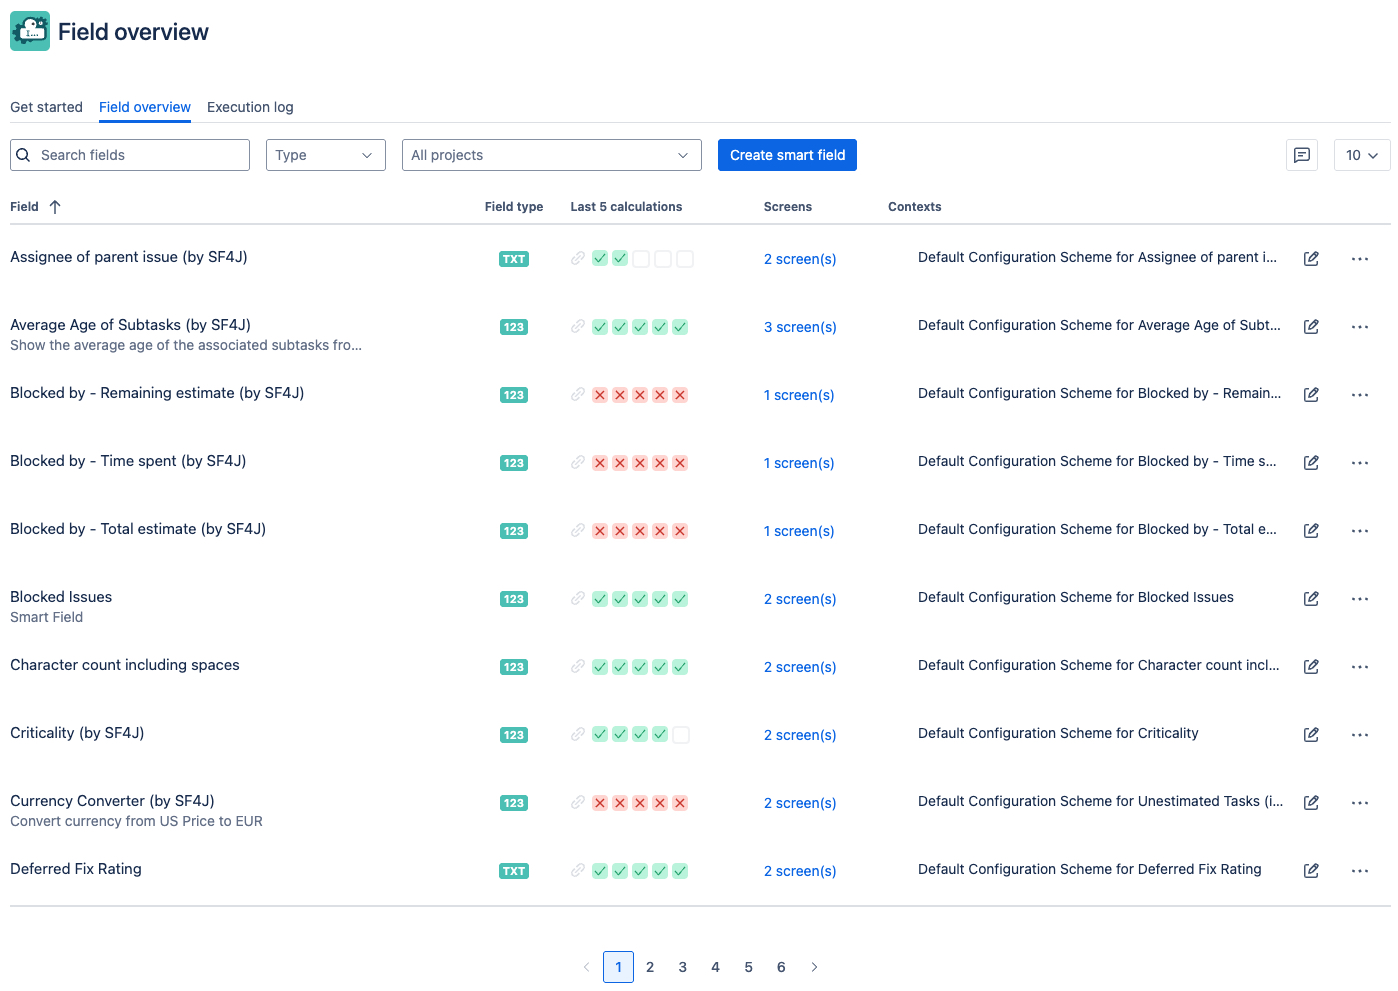
Next to the name of each smart field which is displayed in the first column of the table you will find the following information.
Field type
Displays the field type of the smart field. Currently either text or number.
Last 5 calculations
Displays the execution status of the last 5 calculations of a field.

✅ The calculation was successful
❌ There was an error calculatng the field
🔗 A link to the execution log which is then pre-filtered to show the executions of that specific field
Screens
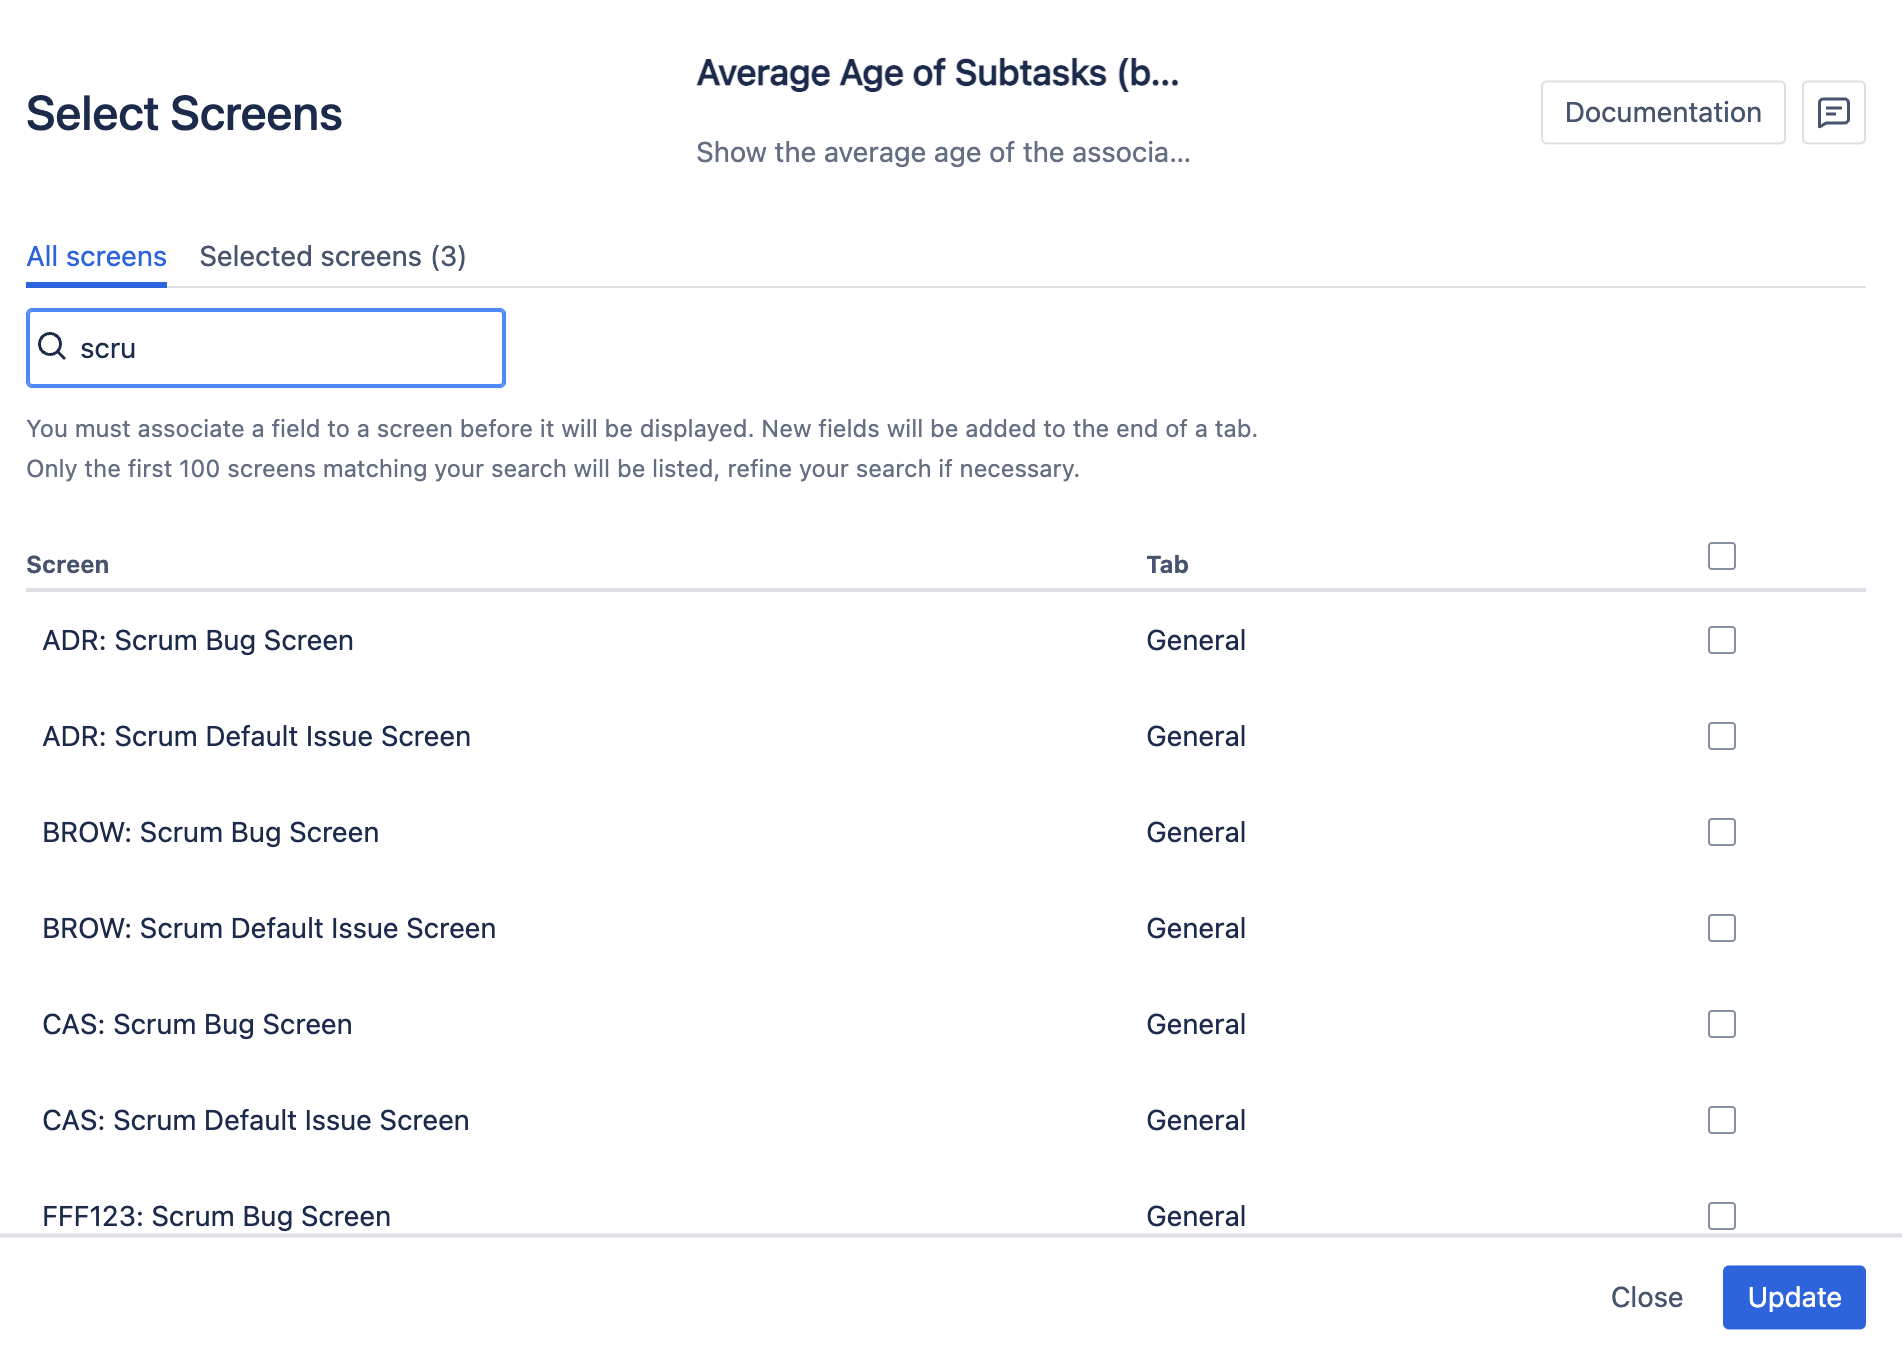
Shortcut to the screen association of the field. When working with a Jira site containing a large number of screens, selecting a screen manually can be tedious. When associating a custom field with Jira screens, you can use the search box at the top of the list to filter which screens are displayed.
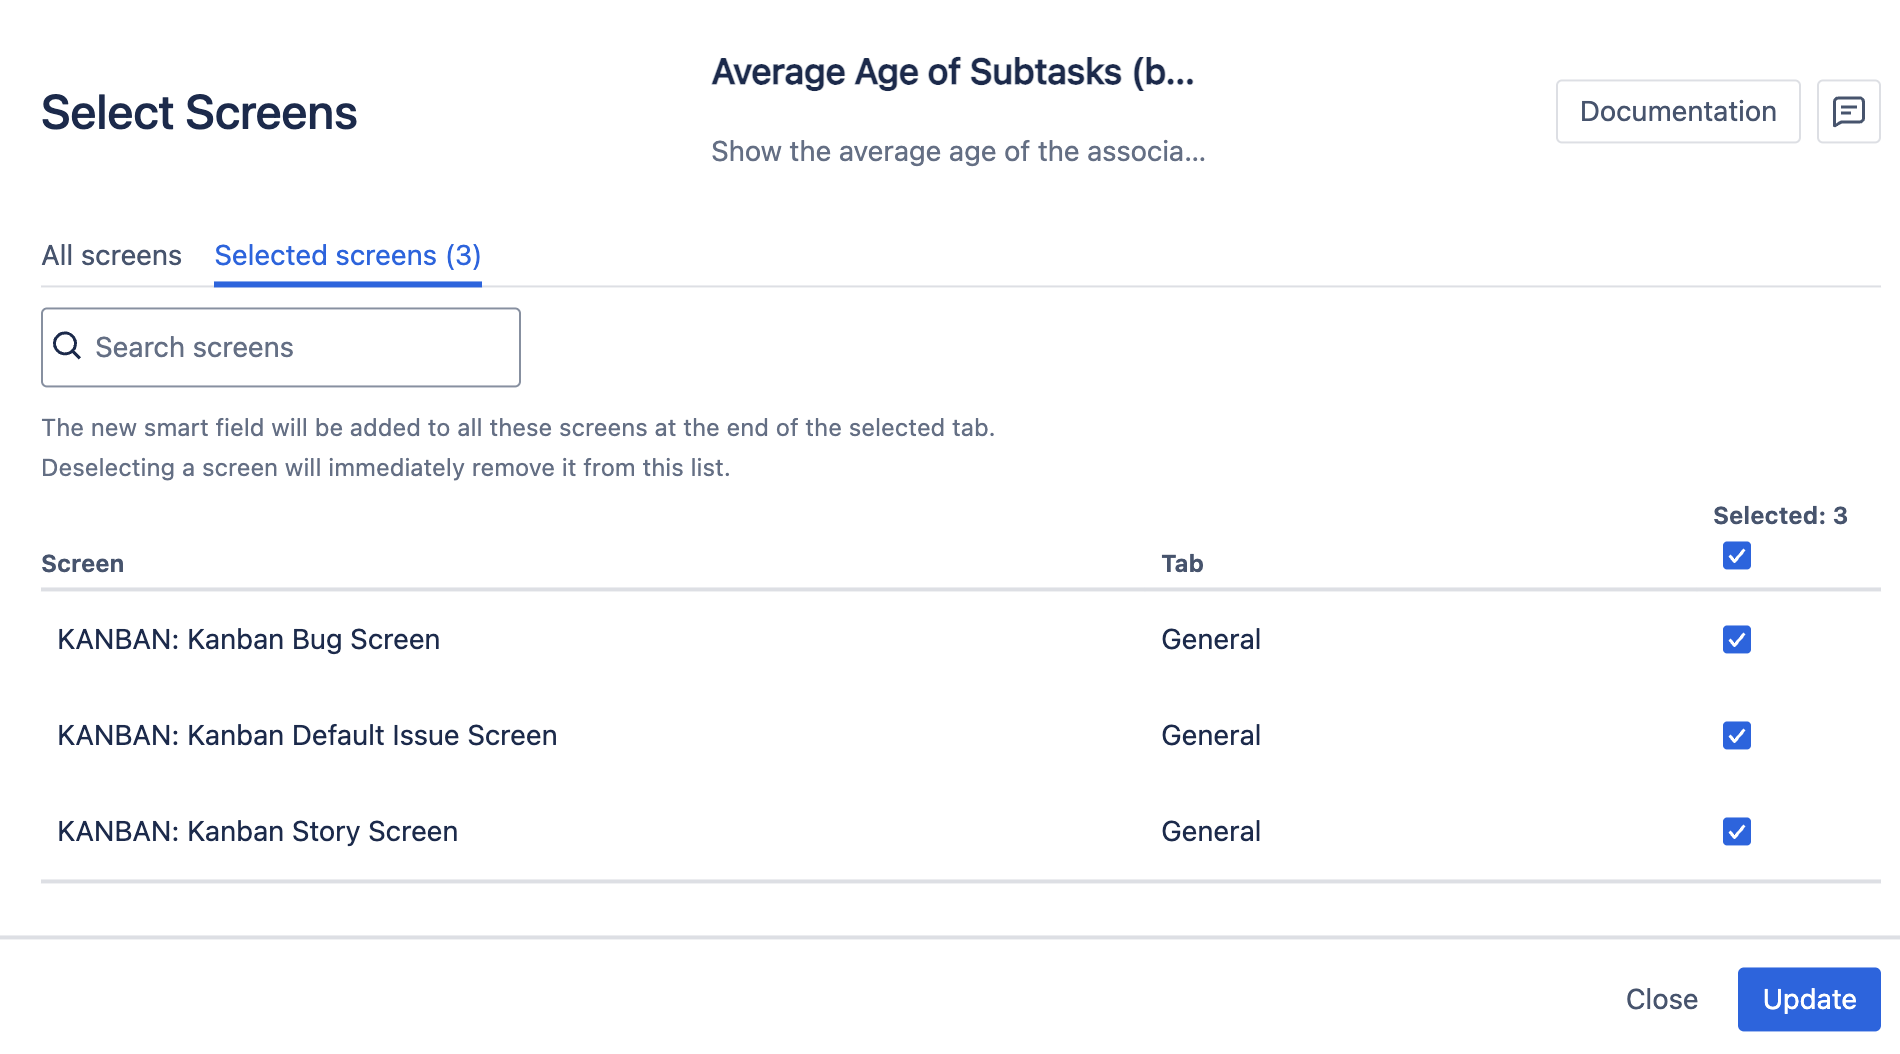
The Selected screens tab only displays the screen the field has been associated with.
Note: Using the Select All/Deselect All checkbox at the top of the list will only select or deselect the screens that are currently visible.
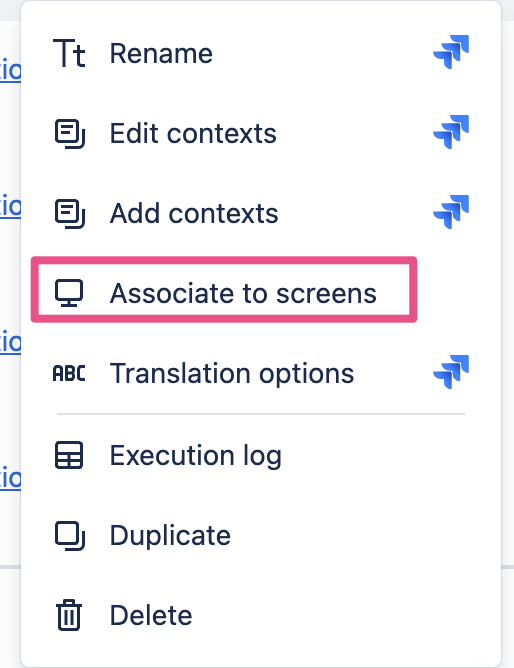
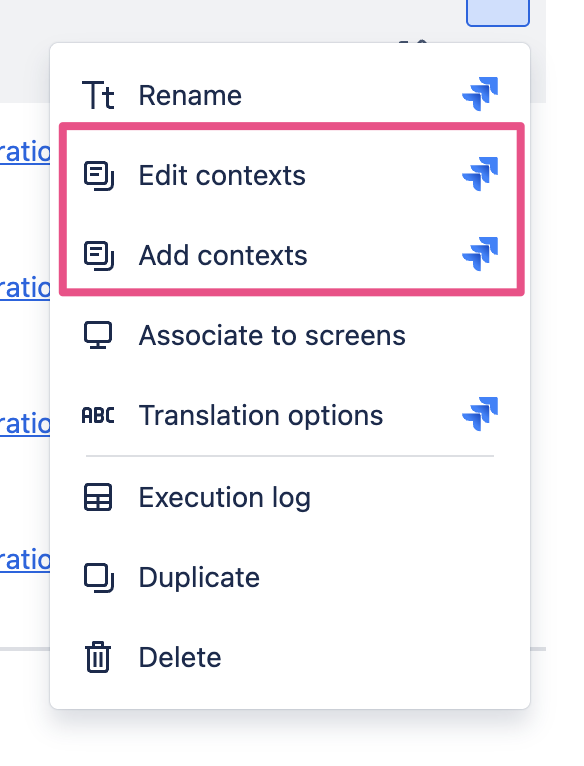
Alternatively you can use the “Associate to screens” operation.
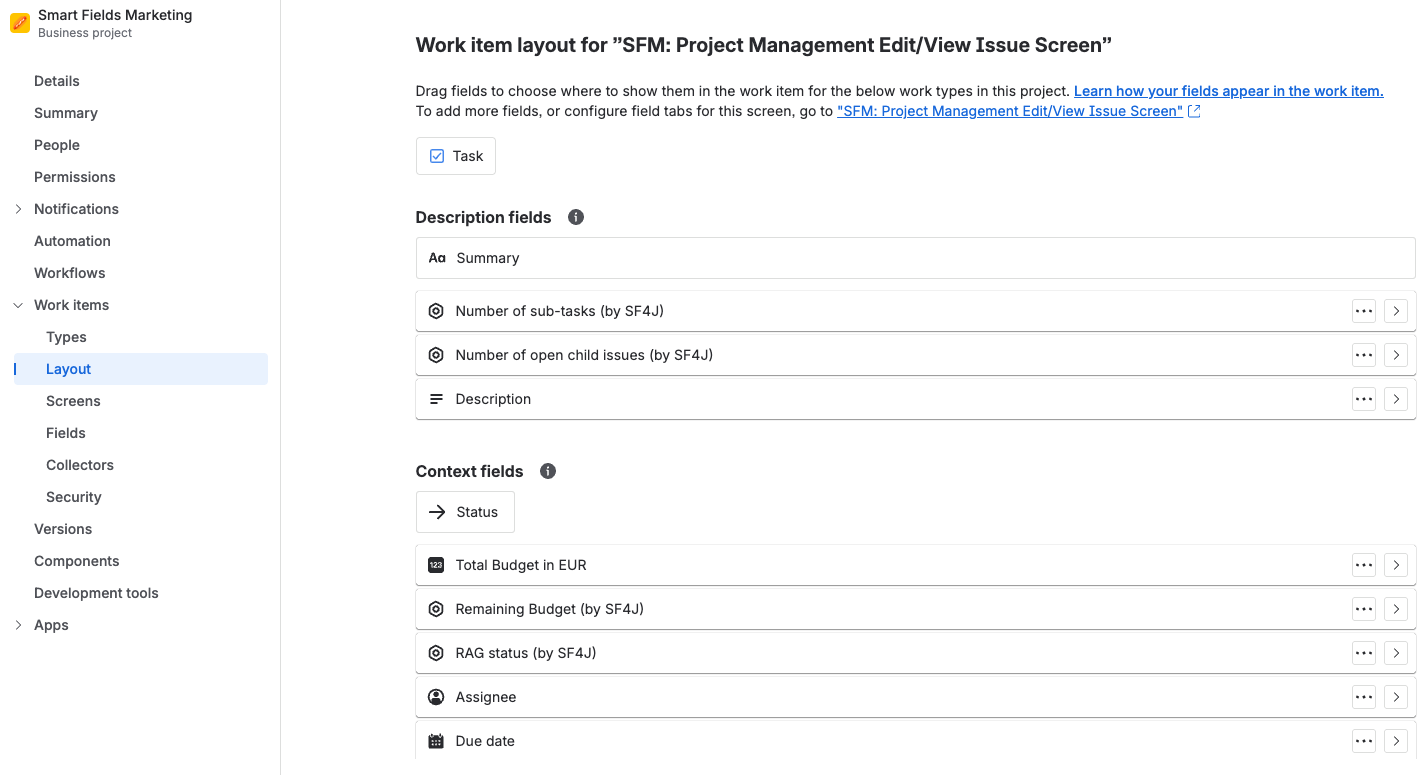
If you don’t see your smart field in a work items you might want to check out the work item layout. https://support.atlassian.com/jira-cloud-administration/docs/configure-issue-layout/ and place the field either in the Description fields or the Context fields section.
Contexts
Fields in Jira can be used across multiple projects and work types, but it’s rare for a single setup to meet all your needs. To prevent duplicates, administrators can create different versions of fields. This is what Jira refers to as a Context.
On the field overview you can inspect which context each smart field has.
For fields with multiple contexts (e.g. different calculations for individual work item types) all contexts are being displayed in a dropdown next to the context name and you can directly jump to its configuration (the selection of projects and work item types) by clicking on the pencil next to each context.
By default a smart field is created with a global context which makes it potentially available for all projects and work item types.
However, this might lead to fields being “calculated” even if they are not on a screen, simply because they are available which costs resources and might show unexpected results in the execution log

As an alternative you can use the context menu to edit and even add new contexts.
To improve the overall Jira performance it is highly recommended to limit the context to only those projects and work item types where the field is actually needed!
Edit
Once you click on the edit icon (pencil) you can edit details of the smart field. More information about the options can be found here: Create and configure smart fields
If you have multiple contexts configured, you can expand the context section and an edit button will be shown for each individual context.

Additional options / operations
All operations that are marked with :logo_jira: will open up the native built-in configuration pages.
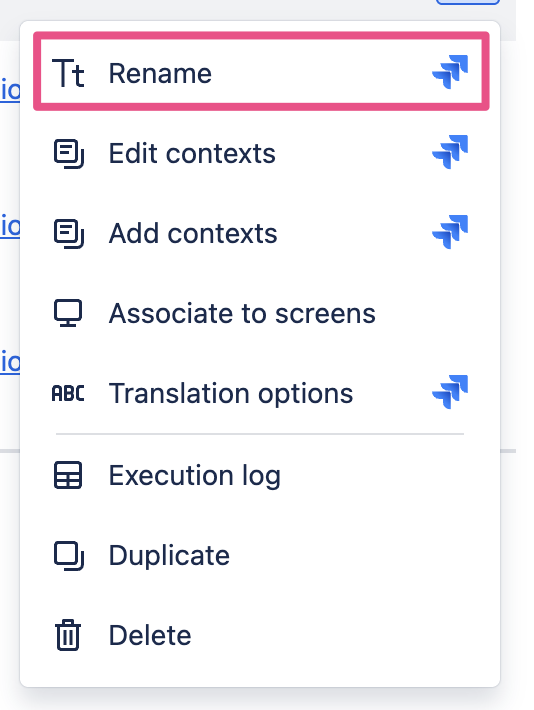
Rename field and update description
You can rename the field either in the field overview when you choose to edit the field or by using the standard Jira option to edit fields.

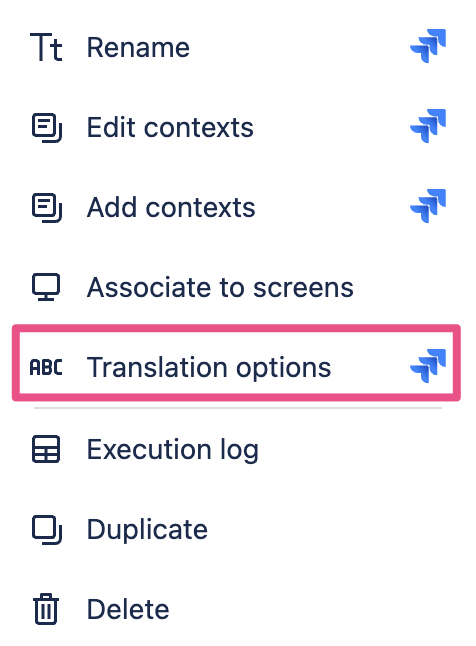
Translation options
Custom fields can be natively translated in Jira. Use this option to provide a translation.
Duplicate
Use this operation to duplicate the smart field.
Delete
Use this option to deleted the smart field from you site.