This page will show you how to create and configure a smart field.
This page offers clear instructions for creating and configuring smart fields in Jira. Smart fields are dynamic and enhance your Jira projects by enabling tailored data entry and display options. To set up these fields, you will define their purpose, select suitable data types, and configure settings to ensure proper functionality.
Remember, you need Jira administrator permissions to create and configure smart fields. This helps maintain the overall structure and data integrity of your Jira site.
Create a field
Go to the Field overview page or the Get started page in the Your apps section of the sidebar navigation and click on the Create smart field button.
💡 Tip: The field overview works just like a control center — you can create new fields, check their status, and Manage existing smart fields / Field overview without jumping between multiple Jira admin screens.
Click on Create smart field to launch the guided creation process.
Select a template
Now you have two choices:
-
Select and potentially tweak one of the existing built-in Templates.
-
Create a custom smart text field or smart number field.
Head over to to the Smart fields library to get some inspiration or example use cases.

You can use the Type (text vs. number) or Category dropdown or search through the templates to see whether what you need is already built-in.
Optionally add a new name and a description to the smart field in the configuration menu. This can also be done in the last step of the creation process.
The Custom smart number fields and the Custom smart text fields templates can be employed for building individual fields for your own specific use cases with our built-in Expressions or Atlassian’s Jira expressions.
-
Click on Next after selecting the desired template.
Configure and preview
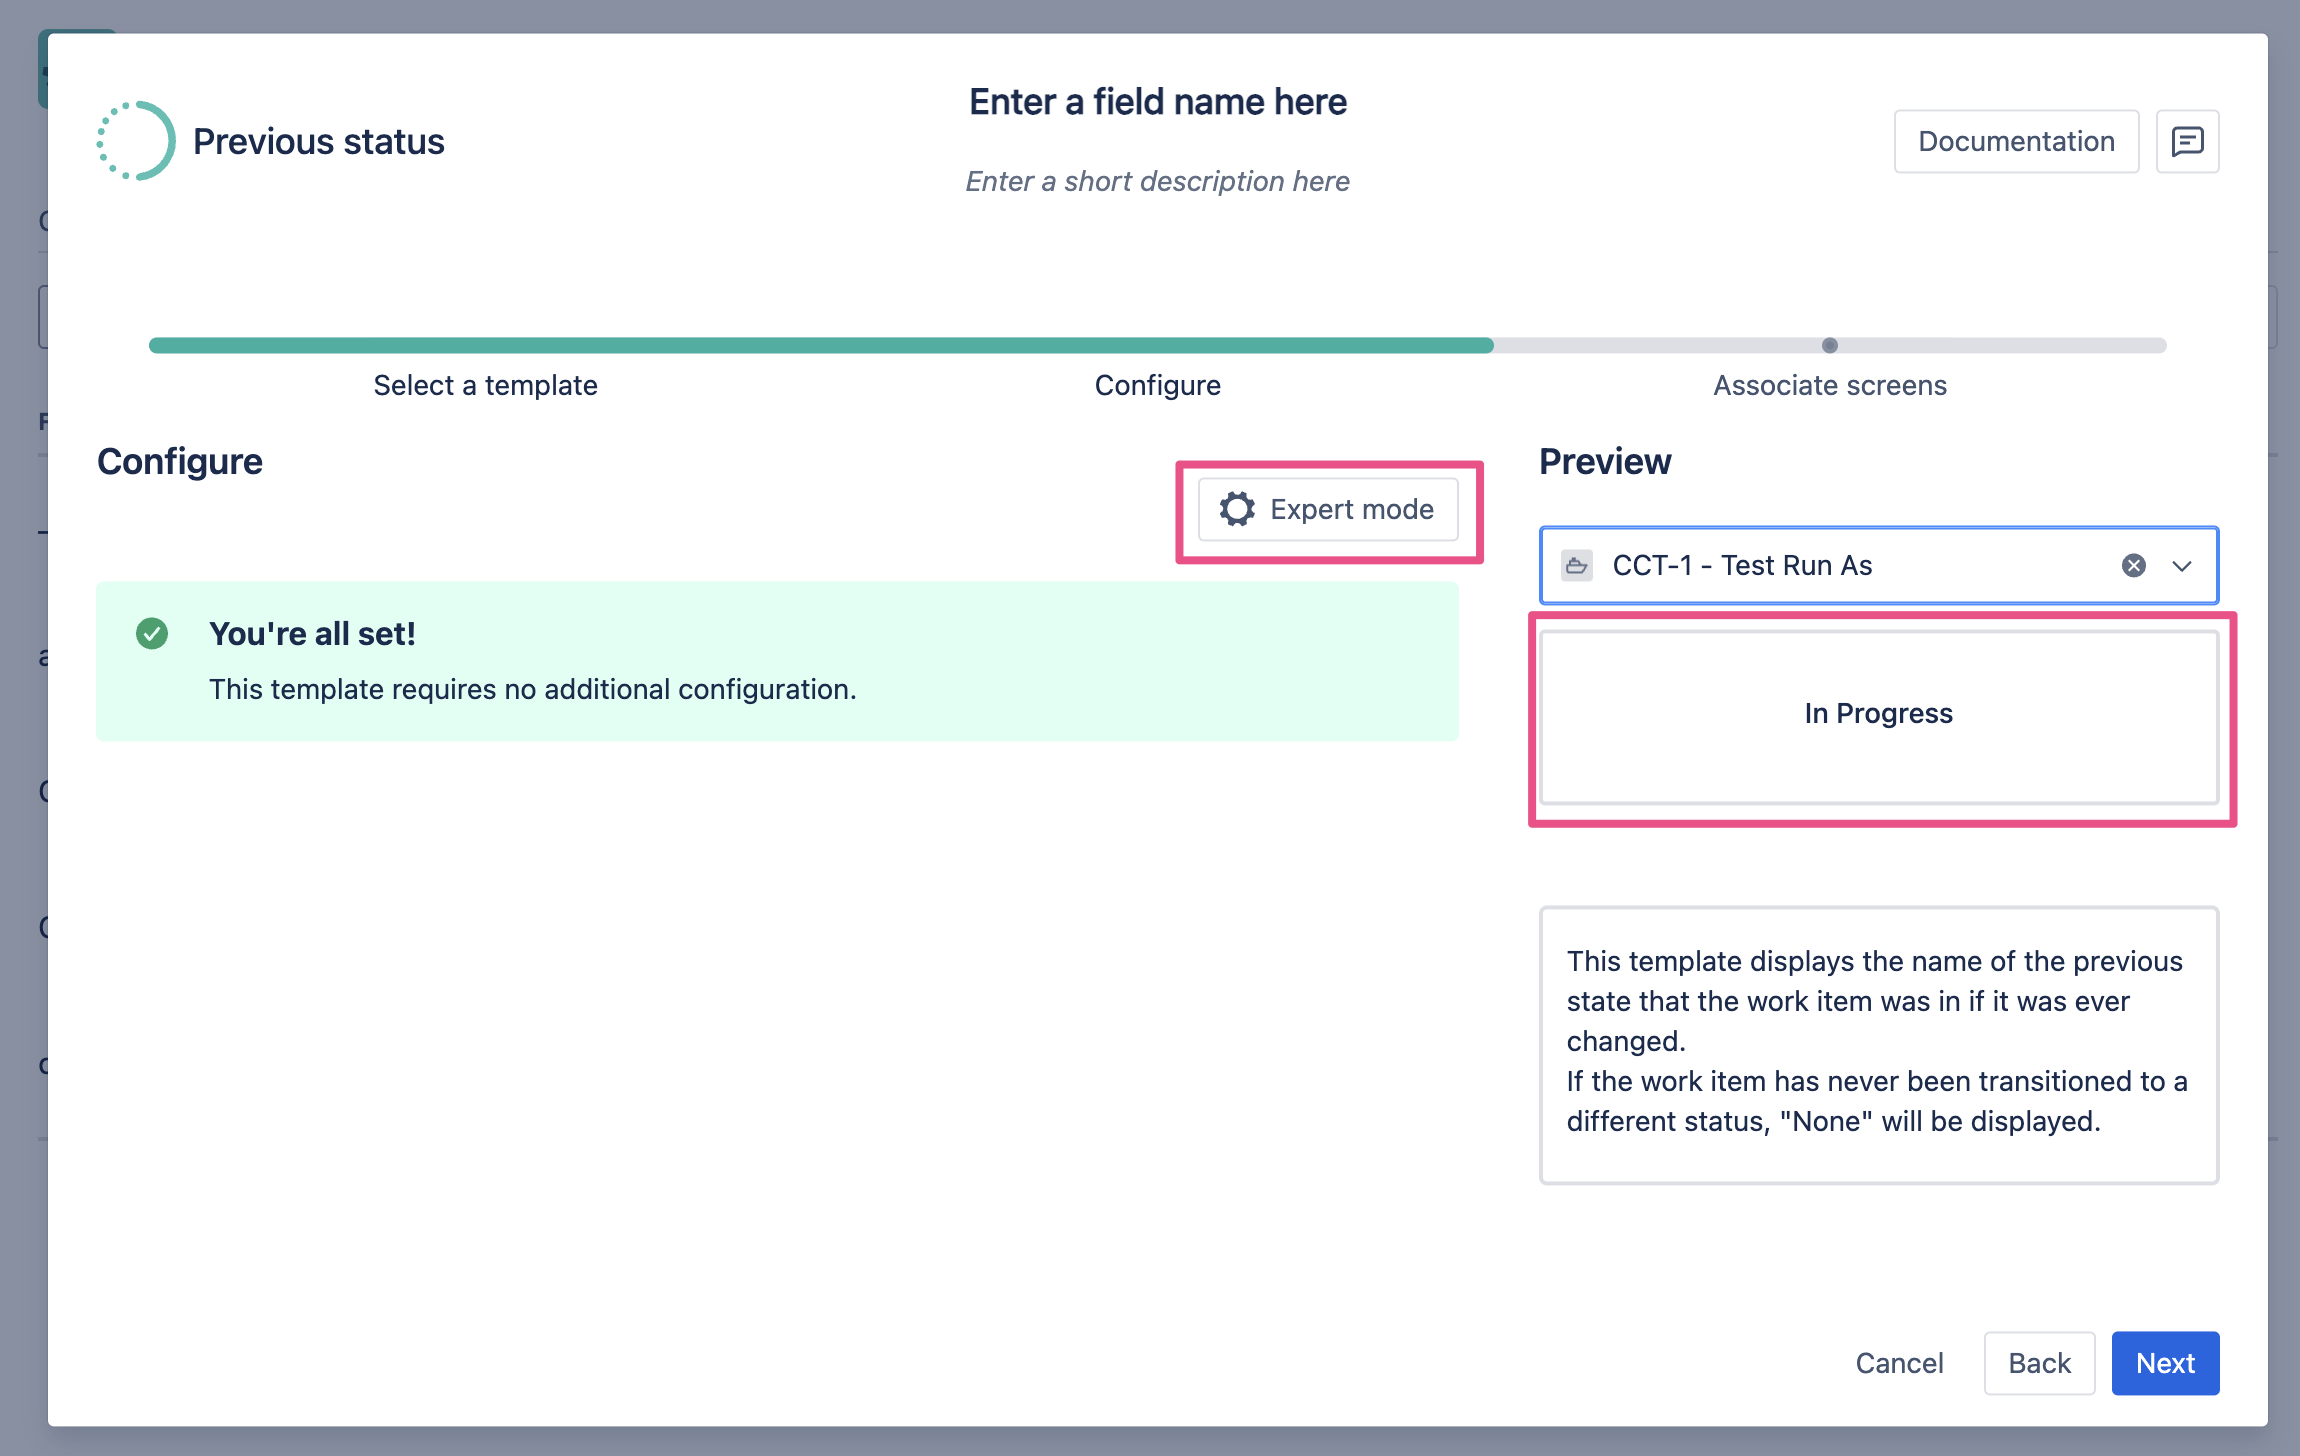
Most of the built-in templates don’t need any updates for the smart field to work.
Take the Previous status template as an example. Simply select a work item in the preview section and the result will be displayed right away.
Our templates, however, offer a feature to update and tweak the underlying expressions.
Expert mode
Once you click on expert mode, you will see the expression behind each template. The Custom smart number fields and Custom smart text fields templates only offer the Expert mode as there are no pre-configured. Head over to the Smart fields library to get some inspiration.
Why would you need to tweak an expression? Let’s say Jira configurations can deviate from the “standard”.
Let’s take the Count unresolved blocking work items template as an example. Once you switch to the expert mode you will see the following expression:
%{count(filterByResolution(linkedIssues("is blocked by"), ""))}
As per default Jira uses the “is blocked by” link type to match blocking work items. However, a Jira administrator might have updated the link descriptions to “is blocked by work item” or “blocking work on”
In this case you can easily adapt the expression manually.
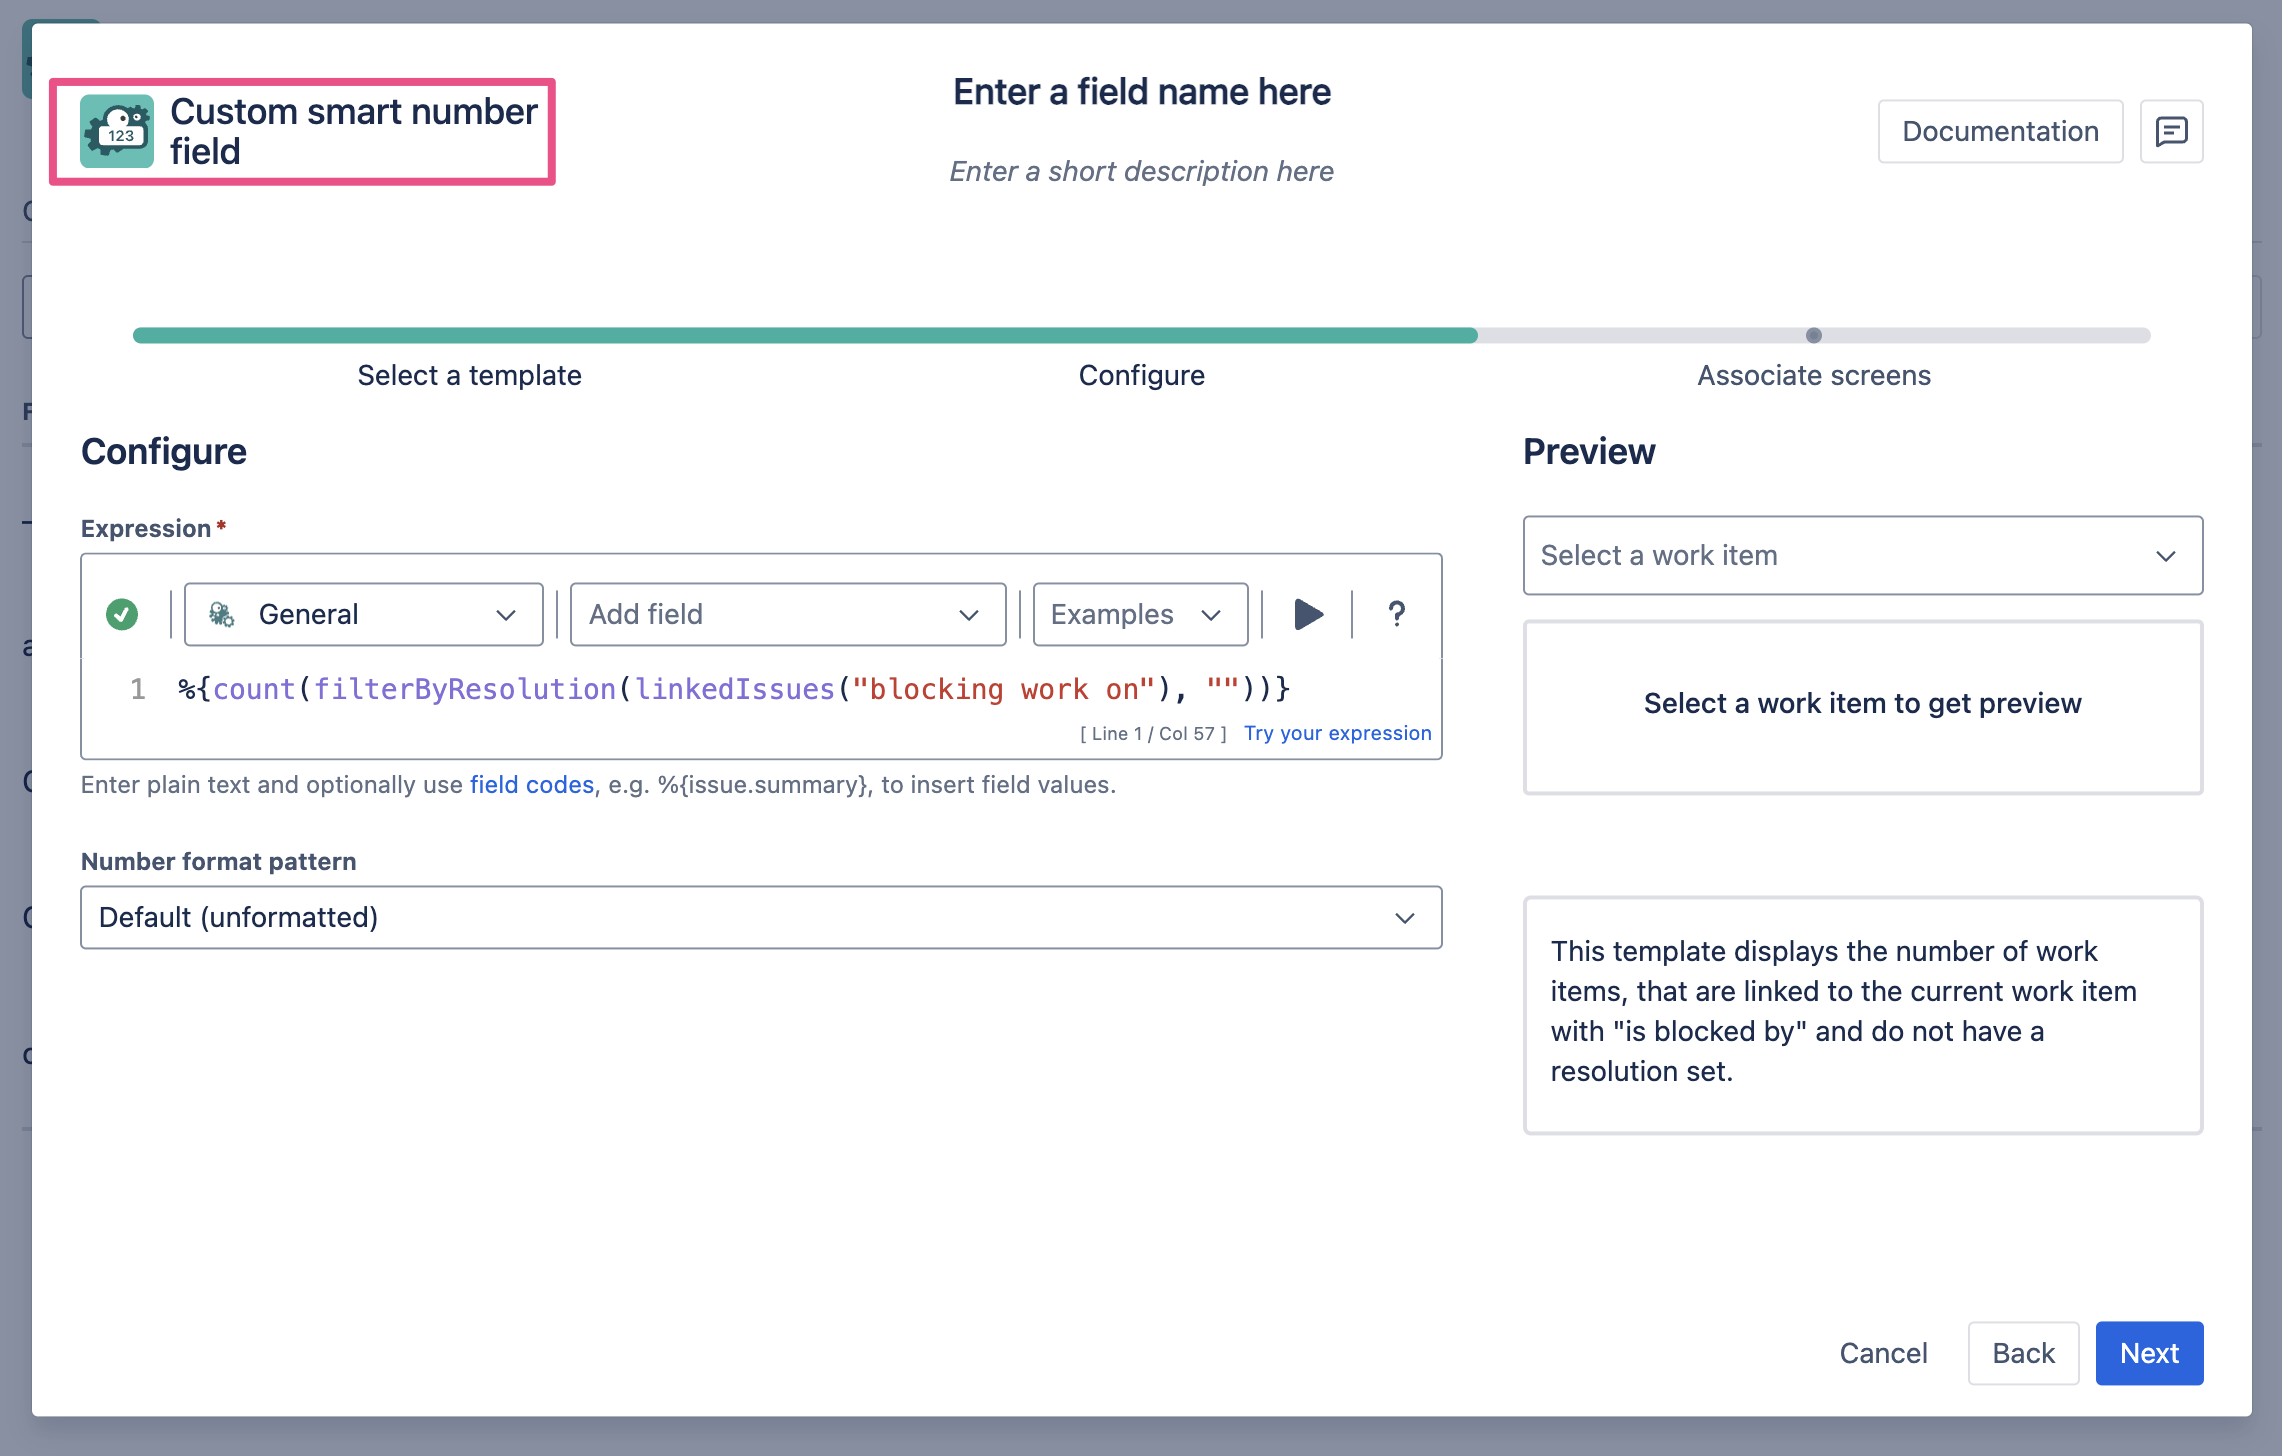
Once you switch to expert mode, the template name will automatically change to a custom smart number or text field.
Field code lookup
If you are editing a custom expression and just see the field code (e.g. issue.cf10333) use the Add field dropdown and search for the field ID to look up the field name.

For more information about the expression editor and the expressions themselves, visit our JWT expression editor pages.
Some templates will require you to select one or several fields to retrieve values from, such as the ICE score. In such cases, select the fields of your choice before continuing.
If your template is a smart number field, optionally add some formatting to your expression. You can learn more here: Display formats.
Click on Next after your happy with the results.
Select screens
Search and select the screens where you would like to display the value of your smart field.
You can view up to 1.000 screens at once. Use the search filter to find specific screens.
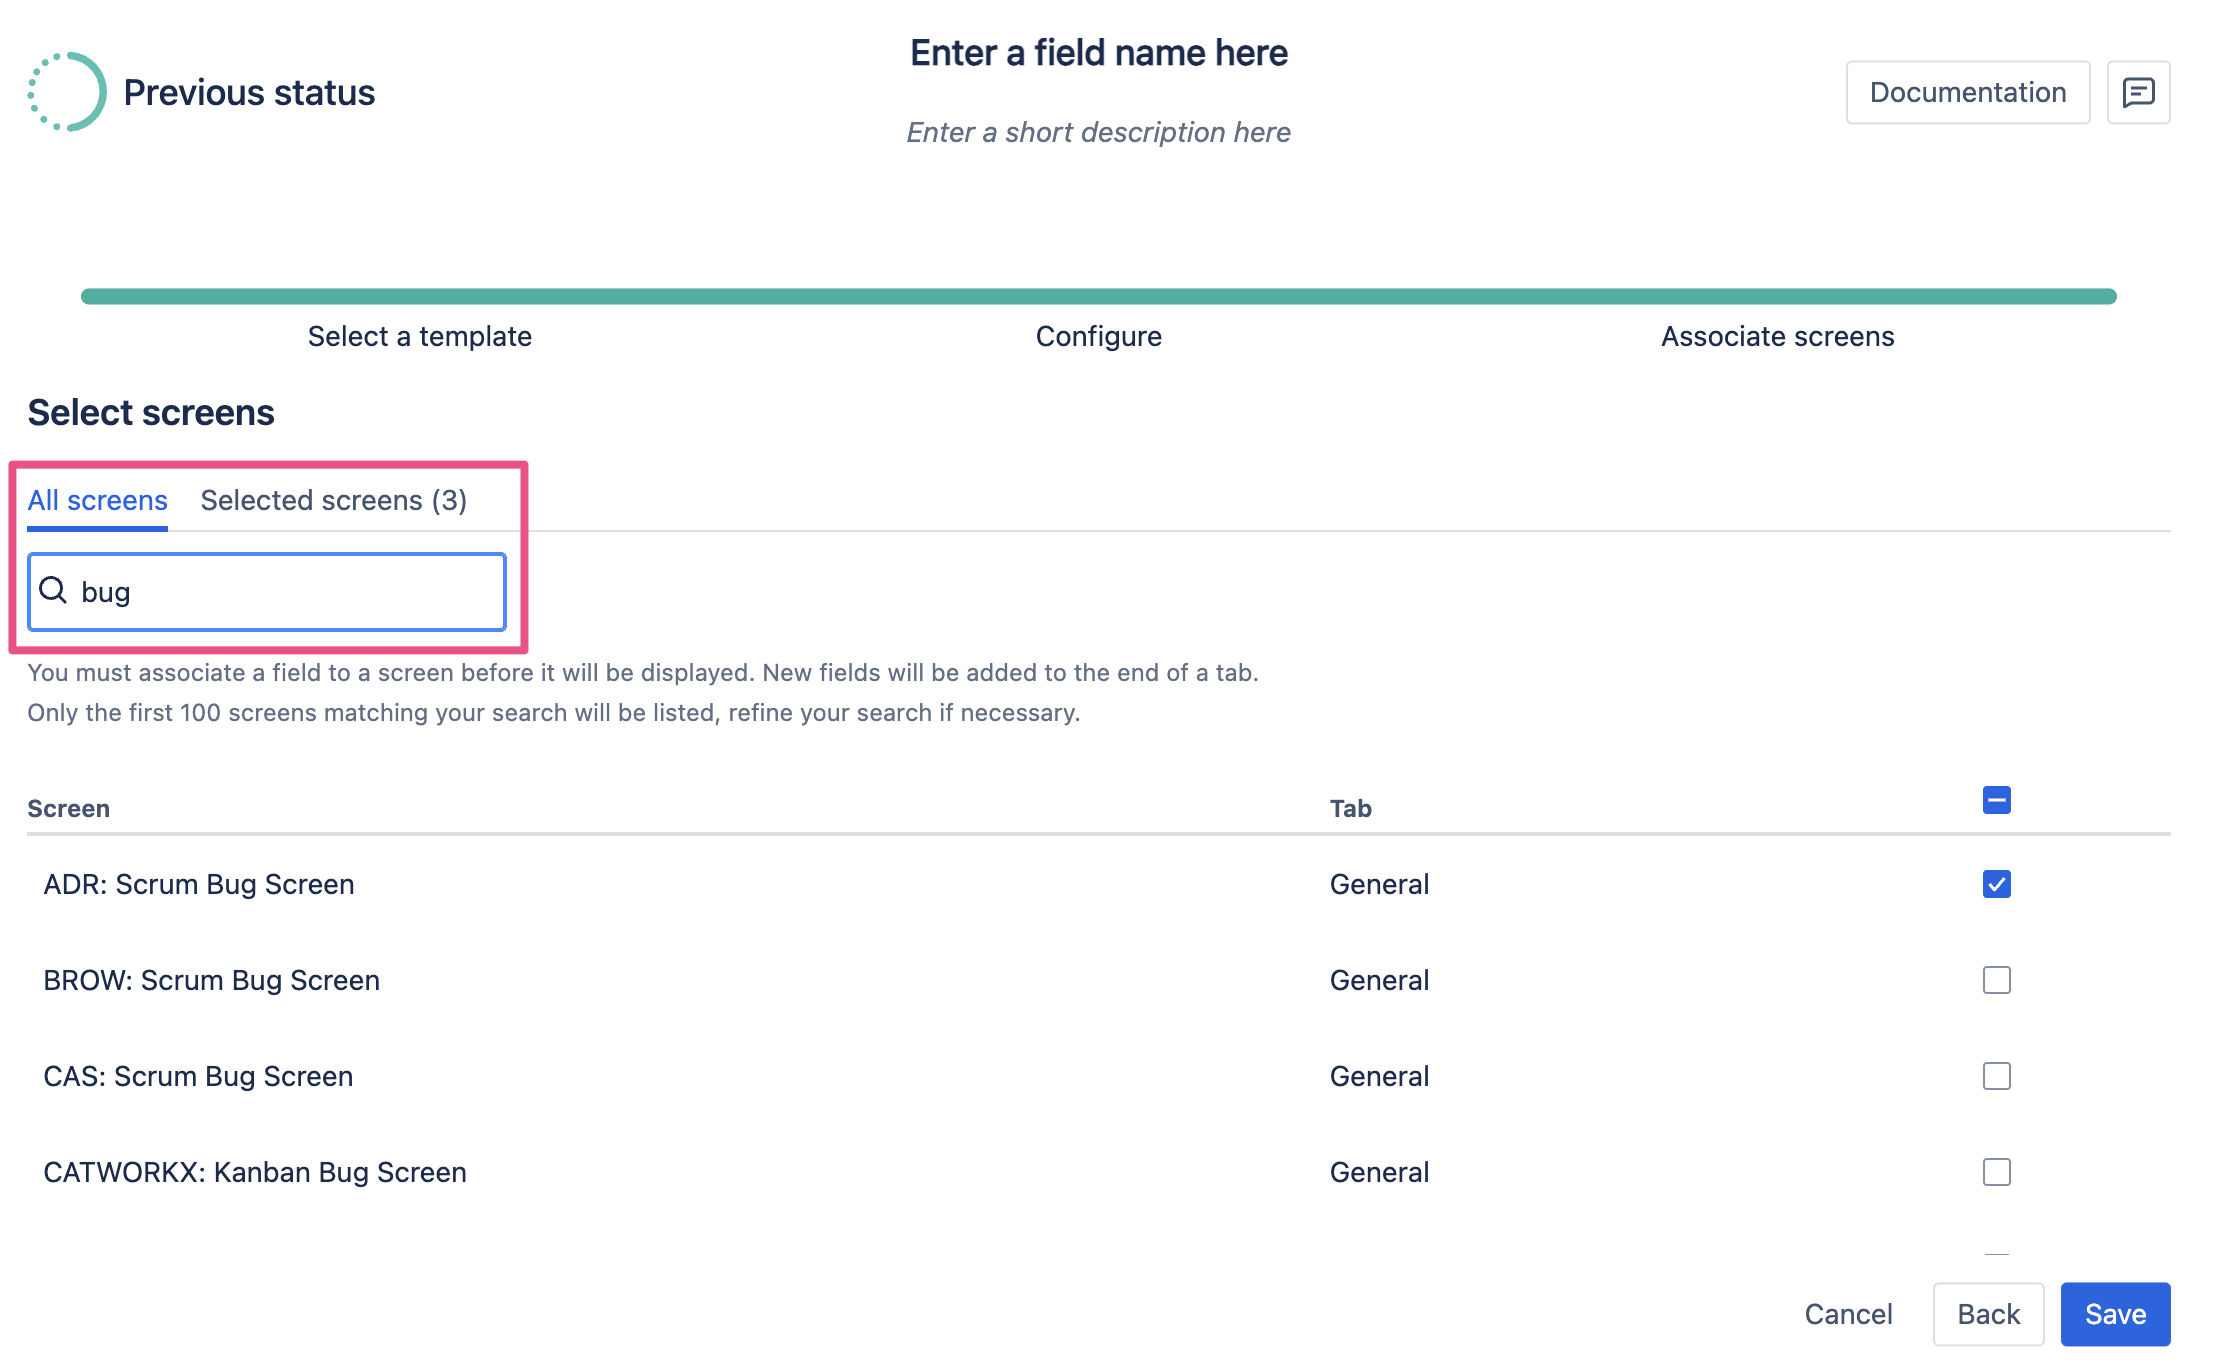
Once selected, they will show in the selected screens tab.
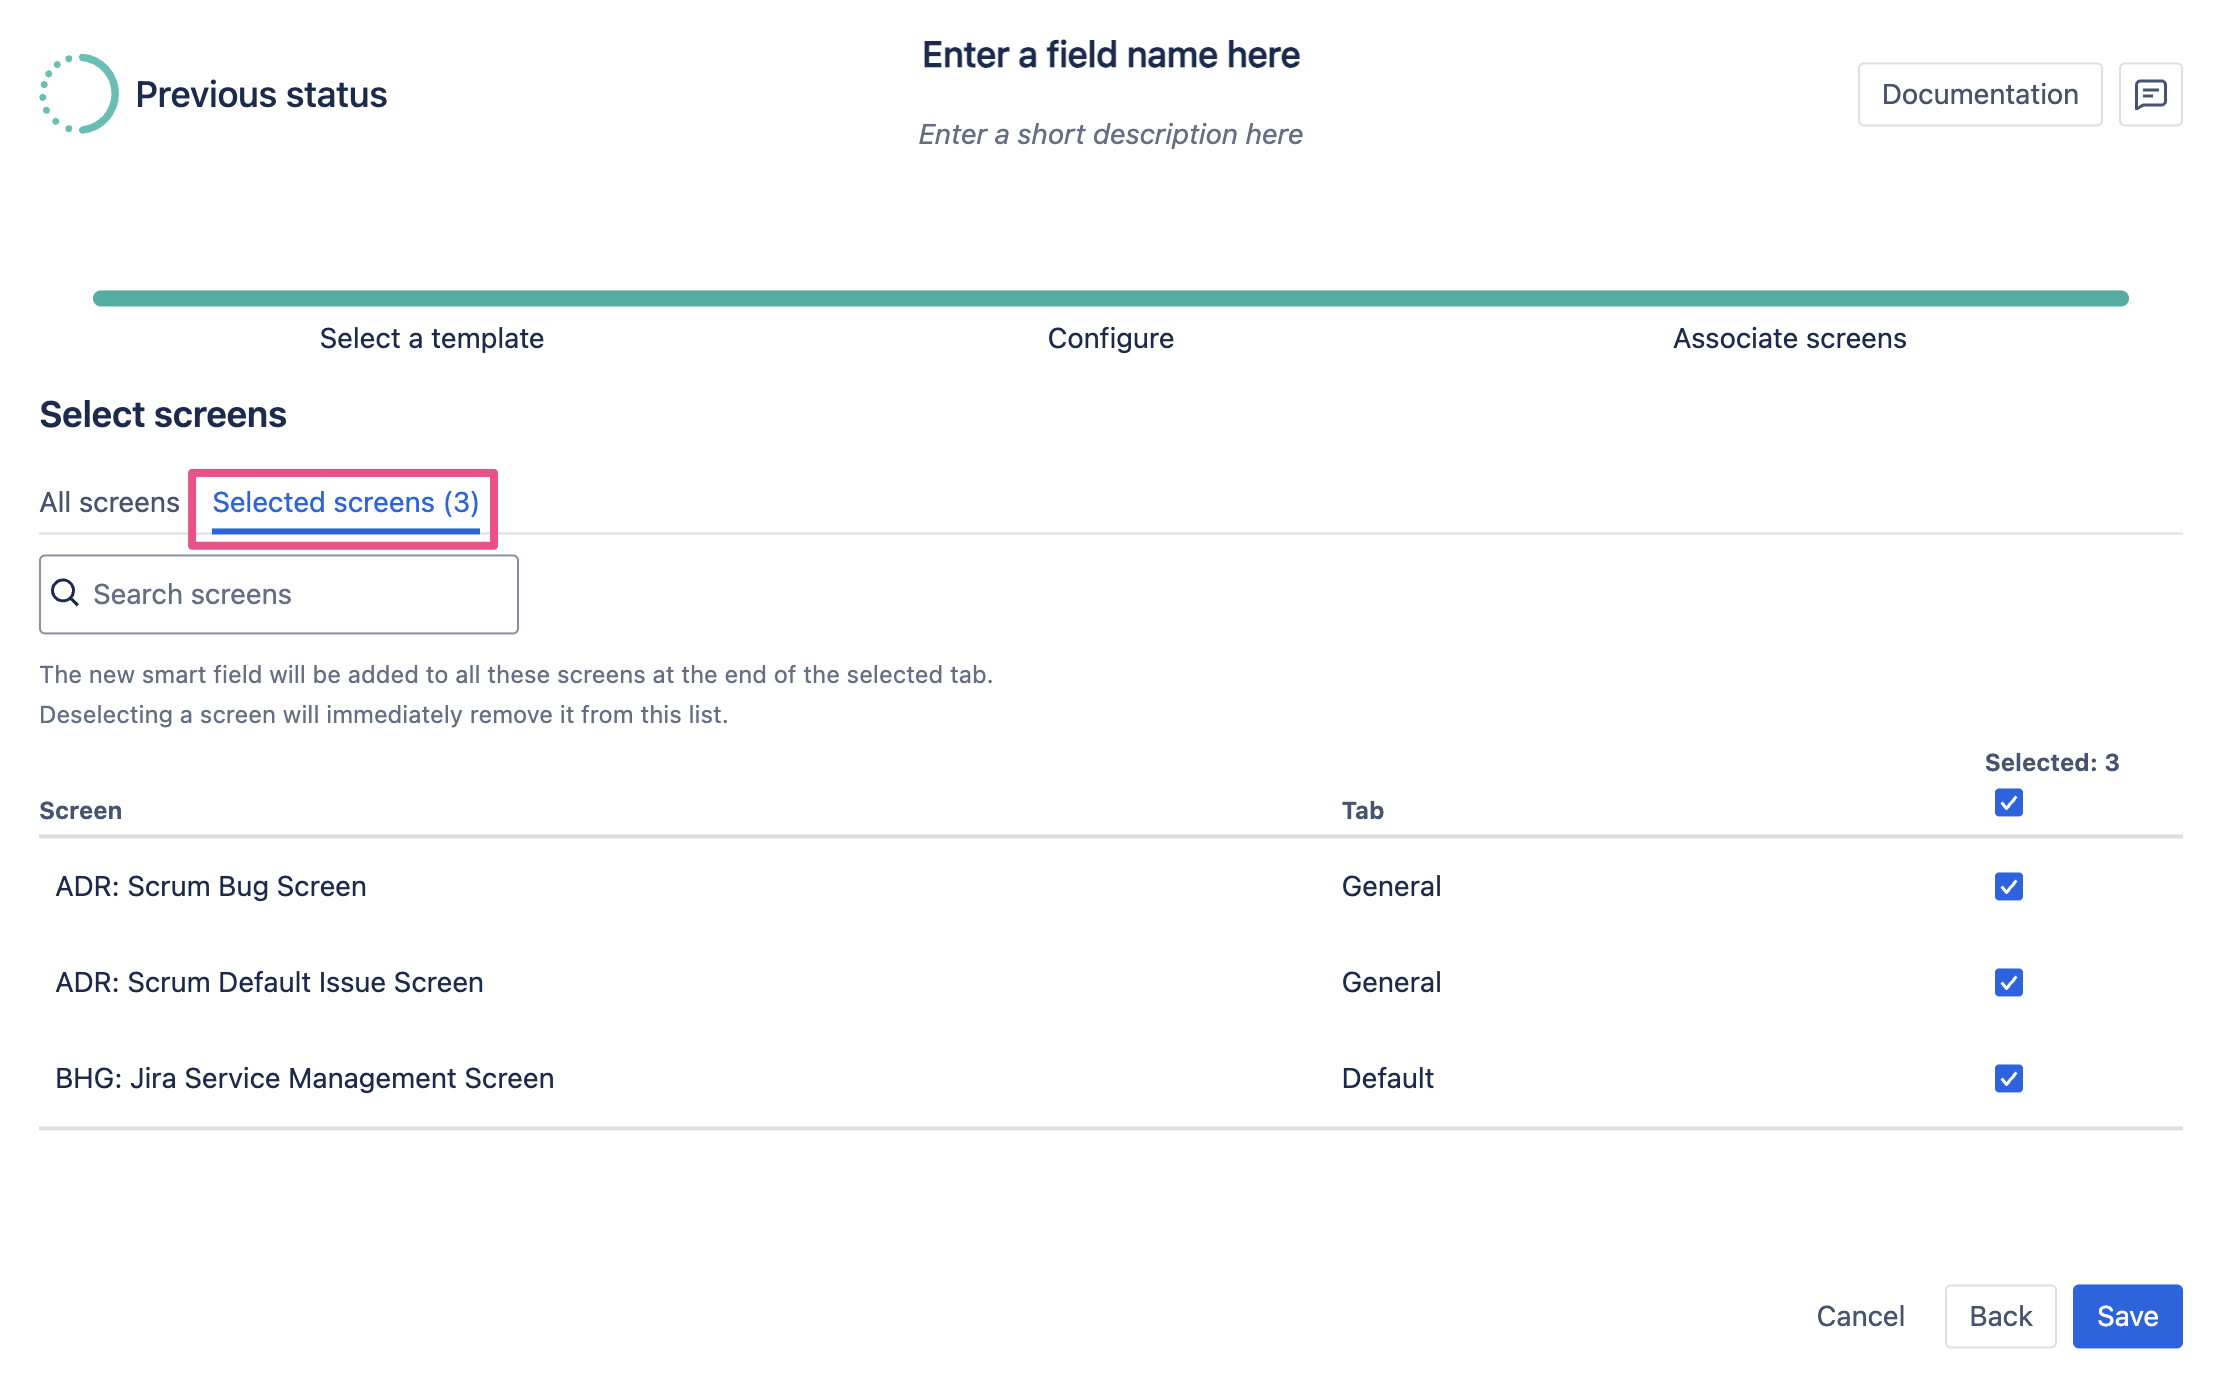
Note: Using the Select All/Deselect All checkbox at the top of the list will only select or deselect the screens that are currently visible.
Click on Save and confirm to finally create the smart field.
Define the context
By default your new smart field will be created with a global context and will be available for all projects and work types, so it is not necessary to add or edit contexts for it to be viewed.
If you want to edit its context, you can do so from the Field overview page or the native Jira custom field page, just like for any other Jira custom field.